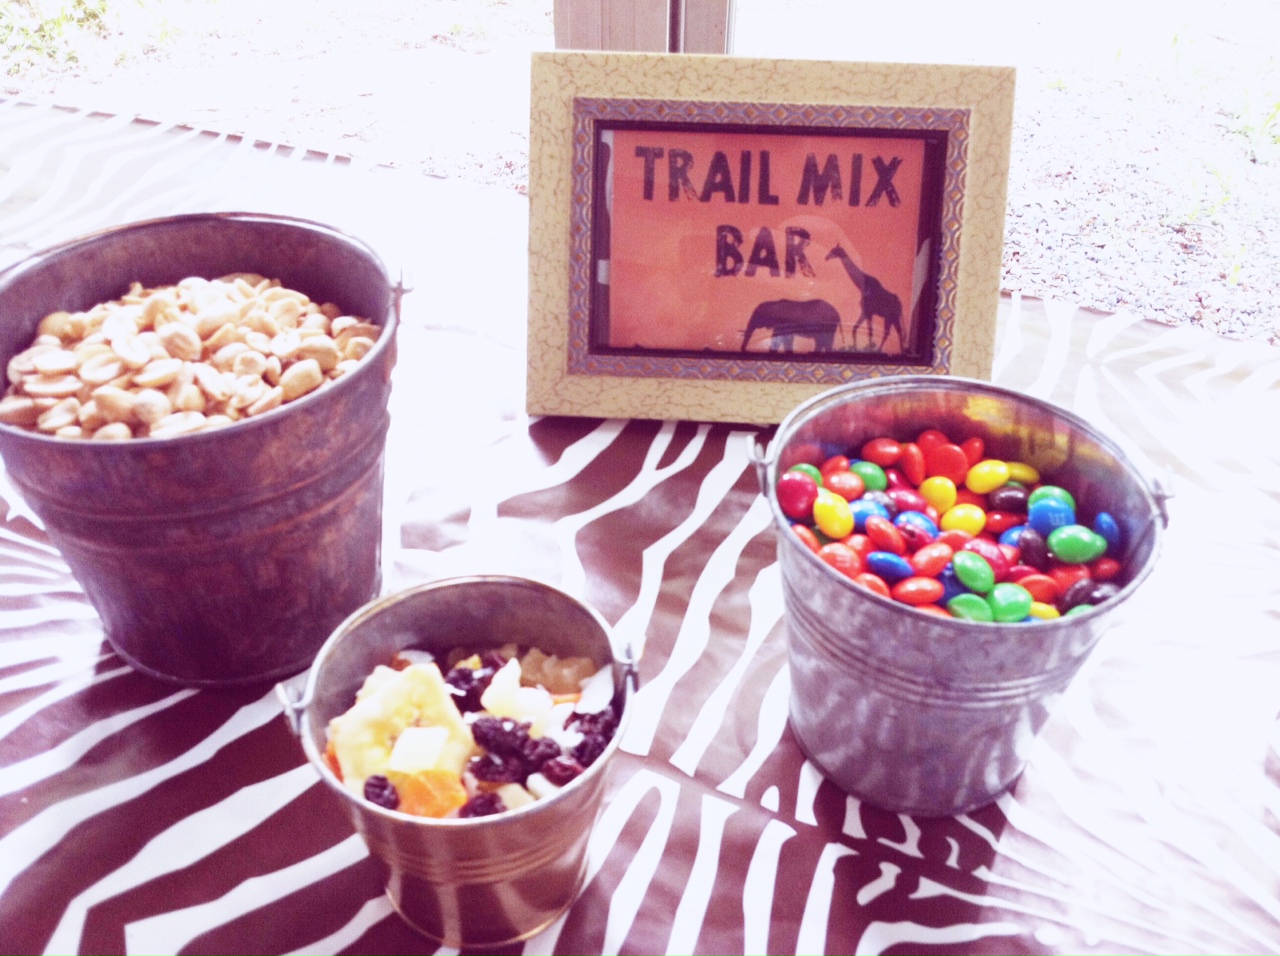
SAFARI FIRST BIRTHDAY


THE INVITES

TRAIL MIX BAR
I decided to do a trail mix bar at the start of the day before we left. I had the kids write their names on the back of the tags and we handed them out when we got to the zoo. It was a easy way to deal with the after lunch/before dinner hunger. Plus, it turned out REALLY cute.


Here is the tags that I used for the bags. I just printed these as a wallet size and cut them out. I tied them onto brown paper sacks with some orange raffia. Just RIGHT CLICK and save the image to your desktop to print.
 
RIGHT CLICK and save the image to your desktop to print in any size

I also got some Expedition Supplies. The kids LOVED this and were so excited to pick out their supplies and hit the road.


I bought most of the stuff from oriental trading and found the old trunk in my parents basement.

Here is the link to the binoculars:

Here is the link to the sunglasses:

I also gave the kids a safari notebook to write down interesting things they found at the zoo. I originally was going to make a scavenger hunt and put it in the notebooks but I ran out of time.

Here is the link for the notebooks:
and matching pens to go around their neck

 .....and we are off!


DINNER

 The table runner is just wrapping paper.


 BLT PASTA SALAD it is AMAZING. We make it for almost every summer get together and it is always such a hit. Click HERE for the recipe.
This is just scrapbooking paper wrapped around mason jars and tied with tan raffia


Animal print duct tape from Hobby Lobby wrapped around water bottles

 Brown table cloth with animal print wrapping paper as the runner.


RIGHT CLICK AND SAVE to print in any size.

Comments

Popular posts from this blog

Sweet 16 Alice in Wonderland Party

Alice In Wonderland Party Theme This is a theme you can make very fun and playful or very elegant and fun. The stuff featured in this blog post come mostly from shops I browsed around on Etsy.  None of these pictures are mine and belong to the shop owners.  I will make sure I leave the link so you can click and buy or print the things you need for the parties you see featured here. THE INVITES Click here for Etsy shop.       Click here for the Etsy shop     The Decor     Click here for 'This way, that way' signs. Colorful paper lanterns are a great idea! Don't forget your teacups! They don't have to be from the same set.  The good thing about Alice in Wonderland is it is very unique and very mismatched and colorful.   The Food     Water Bottle Labels We all know I am queen of themed water bottle labels!  A lot of people sell these but how hard can they really be to make? I'm sure you can even have a ...

Creepy Disney Park Legends

9 Creepy Disney Park Legends You Should Know Before Planning Your Next Trip.  For many, Disneyland and Walt Disney World are wonderful havens of magic and dreams for the whole family to enjoy. It's the perfect hyper positive environment for vacation. However, it's understandable that some members of your family might not totally be on board for the "ooey-gooey-kissy-huggyness" of Disney. Maybe they prefer something a little a little bleaker? Well, it seems that the brightest light casts the darkest shadow. Both Disney theme parks are riddled with creepy urban legends, ghosts and ghouls that aren't just animatronics in the Haunted House ride. 1. Many cast members claim that after dark the dolls in "It's A Small World" come to life, switching places or disappearing altogether.             2. Ever since a male guest died in the 70s, cast members insist that his ghost happily hitches a ride in any empty rocket ship seats ...

Friendship Sticks and other Camp Crafts

Materials 6 sticks, two 18 inches long and four 14 inches long 1 or 2 skeins of variegated yarn Scissors Hand pruners (to cut sticks, a parent's job) Instructions Start by crossing the 2 longest sticks as shown above. Tie the loose end of the yarn around the intersection and wind it around several times to secure the sticks. Next, wrap the yarn around the closest stick, flush against the intersection. Now wrap it around the next closest stick. Continue in this manner, working your way toward the ends of the sticks until only about 3 inches remain exposed. Cut the yarn and knot the end around a stick. To add a frame, place the 4 smaller sticks in a square around the edge of the weaving, wrap yarn around the intersections of the sticks, and tie them in ...